There is a new platform where budding and aspiring singers, musicians, recording artists, filmmakers, video makers, and hosts advertise and showcase their talents – uploading their videos online or on YouTube to gather many views, likes, and shares from its viewers.
Recording videos and audios are made easier nowadays, for you can easily make your makeshift recording studio from the safety of your home. You just need to get the essential tools and in a matter of days, you can be on your way to making your own studio recording.
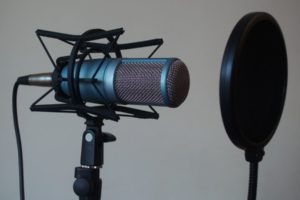
Of course, what is a recording studio without a studio microphone? First, you have to go through the process of picking a studio microphone that will best fit your purpose.
Once you already have the right studio microphone at hand, you can start with setting it up. It can be a little overwhelming at first and it may require some time and patience, but once you get started you will eventually get the hang of it.
How to Setup Studio Microphone
If you are a first timer and you have little experience in setting up such stuff, below are helpful directives you can follow:
Know Your Mic and its Purpose
Before you start with setting up, you have to be clear about how you want to use your microphone and what type of microphone you have in possession. These two factors will be the gauge and the starting point of how you set up your microphone and place your devices in your recording or home studio.
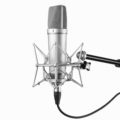
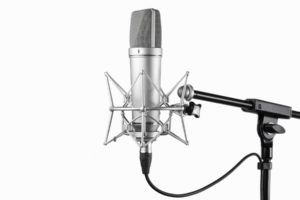
For microphones, there are two (2) major types used for studio purposes: one is the dynamic studio microphone while the other is the condenser studio microphone.
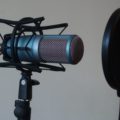
If you plan to use it for the major part acoustic instruments and drum overheads in your recording, or you plan to record mainly vocals, you would need a studio microphone that can handle a wide frequency spectrum, and have a condenser studio mic is the better option.
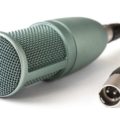
If on the other hand, you prefer recording sounds with high sound pressure levels coming from instruments like drums, guitar amps, and bass, a dynamic microphone will do the work better without distorting the sound quality of the instrument.
If you have to multi-task and plan to record both, it is advisable that you get both types and interchange it when you change the instrument you are recording in order to not compromise the quality of your recording output.
Start with the Actual Setting-Up: Get Hold of a Recording Console & XLR Cable
You will need a recording console and an XLR cable to go about with this. The first step is for you to take hold of the female end of your XLR cable and plug it into your microphone. Follow through by plugging the male end next into your recording console’s input slot. If you are using a condenser microphone, your phantom power should be turned on for the former to work.
However, a word of caution: if your condenser mic has an external source of power – which tube condenser mics often have with them – do not switch on your phantom power source to prevent damaging of your microphone.
Estimate the Distance Between the Microphone and Sound Source
As for the distance of the studio microphone (both the condenser and dynamic type) from the sound source, it would really depend on which sound you aim to capture in your recording.
If your purpose is to pick up the ambient sound – the sound created by your studio’s reflections rather than the sounds created directly by your musical instrument or your vocals – you have to place the microphone some feet away from the source of the sound.
If on the other hand, you want to record the intimate sound of your voice or of a specific musical instrument you are playing, you have to position the microphone nearer the sound source to cancel out the other noises created inside your studio room.
If you want to strike a balance between the ambient sound and the direct sound, you have to reposition the microphone one to a few times in order to check if you are able to capture both.